Showing posts with label On The Farm. Show all posts

Saturday, January 20, 2018

Farm Animal Birthday

Hello Scrapping Cottage friends! Thanks for taking the time to stop and visit today. It's Mary Marsh here bringing you the Saturday edition of the Blog. Hope you are staying warm during this cold snap that is currently with us.

While we are preparing for a brand new CottageCutz release, the design team has been showing you a mix of creations from some of the older dies. And, that's where my card is going today. I created this birthday card from the stamp & die combo farm animals. So lets get started with the details on how I created my card.

Step 1: As I frequently do, I started my card with the layout. I saw this sketch posted on the Splitcoaststampers site and a card idea immediately came to mind. Well a rough idea had been brewing in my mind for awhile. Then this sketch just finalized everything.
Step 2: As with any sketch you can change things up a bit. Like the shapes that are shown here. I decided to used the circles and stitched circles die for my shapes. I chose circles because of the background designer paper I am using. The paper reminded me of cow spots so I decided to go with a circle to place the cows on. The circle die only is currently on sale at 60% off the regular price. So you can pick it up for only $7.95 right now.

Card Base: 4 1/4" x 5 1/2"
Patterned Paper: 4 1/8" x 5 3/8"
White Circle: 4th largest die
Black stitched circle die: 4th largest

Step 3: I stamped the cow images, used the corresponding die and colored the images with both Copic markers and Prismacolor pencils and gamsol. Gamsol is odorless mineral spirits that is used to spread the wax in the pencil around.
Copic Markers: E000 + E02
Primsmacolor Pencils: Black PC935 + Warm Grey 70% PC1058
 
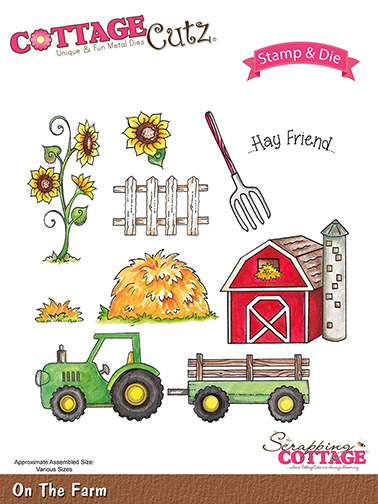
Step 4: I thought the cows needed a little pop on the white circles. So I cut a scallop circle for a cloud template and I stamped the hay from the "on the farm" stamp & die combo. Sponged the clouds with distress ink and colored the hay with alcohol blenders.
 Step 5: I am ready for the card assembly. I attached the cows to the circle panels with Scotch mounting tape. And used the same adhesive to attach the circles to the patterned paper layer.
Step 6: I decided to make layer 4 of the above sketch my sentiment panel. I wanted the panel to be a pierced rectangle but the rectangle dies were just a bit too big to fit in the corner. So I adjusted the size of the 4th largest pierced rectangle.
The first photo below shows the finished panel with my stamped sentiment as well as the original size of the rectangle.
I placed the panel back in my big shot and just moved the die to where I wanted to re-cut it.
Once I re-sized the panel, it was the perfect fit for my sentiment as well as the corner of the card.
And that my friends, completes my card for this week. If you have these stamp & die combos, I hope I have given you a new idea for using them. If you don't have them they are still available in the online store. In fact, the on the farm stamp & die set is on sale for 50% off. You can get it for just $10.
See you all next Saturday!!
 
Dies I used to create card:
http://www.scrappingcottage.com/cottagecutzfarmanimalsstampanddie.aspx

http://www.scrappingcottage.com/cottagecutzonthefarmstampanddie.aspx
 
http://www.scrappingcottage.com/cottagecutzcirclesetbasics.aspx

http://www.scrappingcottage.com/cottagecutzstitchedcirclesetbasics.aspx
http://www.scrappingcottage.com/cottagecutzpiercedrectanglesetbasics.aspx


Thursday, February 02, 2017

Flip Calendar - Part 3


Hi, Lois here again with the third and final post explaining how my flip calendar was constructed.   In addition, I will show how I made the base.


Supplies used in this post:

Copic markers
Foam pop dots
Heavyweight cardboard
Scor-Tape
Scor-Pal
Zutter Bind-It-All machine and wires

As I did with the previous months, I stamped, colored and cut the pieces of the scenery for my last four calendar pages.


I then constructed my scenes, as before, adding whatever icons I wished for each month.


Now I was ready to build my base.  It needed to be rather sturdy, so I used heavyweight cardboard.  I cut two panels slightly narrower (5 ¼”) than my calendar pages and 3 ½” longer (10 ¾”).  I scored one of the panels at 7 ¼” and 9”.  The other one I scored at 7 ¼”, but then I cut off 1 ¾” from the end.  This would allow me to be able to fold the base more easily – with less bulk.  In addition I cut a small “hinge” for the top 5 ¼” x 2”, scored at the 1” midpoint.


Using a Zutter Bind-It-All, I punched six holes, centered, at the top of the two base panels and at the mid-point of the “hinge” and then applied two-sided adhesive tape on the “hinge” and the lower panel of the shorter base piece.


Carefully, I attached the pieces together to form the base.

Again, using the Bind-It-All, I punched holes at the top of each calendar page, making sure that they were centered in the machine before I punched.

Using a 1” Zutter wire, I attached the calendar pages to the base.  And my calendar was finished.


At the end of each month, just flip the page and reveal the following month.  After the June page is flipped, all that is necessary is to turn the calendar around for July. 


And, if you wanted to be able to use the calendar again the following year, all you would have to do is make new monthly calendars and carefully replace the old ones.  Here are all the completed pages of my calendar.


I hope you enjoyed the process of making this calendar.  Maybe you'd like to try making one yourself.

CottageCutz stamps and dies used on today's post are:


Tuesday, January 24, 2017

On the farm

Hi, Janja here!

Another new CottageCutz products line I share with you today. This are stamp & die combo sets. You can choose from eight sets for different occasions.
I have chosen the set - On the farm and supplemented it with two stamps and dies from the set - Farm animals.


Supplies:
- white card base: 5.3 x 5.3" (13,5 x 13,5 cm), folded
- white cardstock: 4.6 x 4.6" (11,7 x 11,7 cm)
- watercolor paper
- Distress ink: Dried Marigold, Worn Lipstick, Festive Berries, Aged Mahogany, Spiced Marmalade, Scattered Straw, Twisted Citron, Mowed Lawn, Tumbled Glass, Broken China, Hickory Smoke, Antique Linen, Ground Espresso

Since I use Distress inks for coloring, I stamped selected motives with black Archival ink on watercolor paper.


Once we have all the motives that we want to put on card painted, cut them out with matching dies that are attached to the set.


For background trim a white cardstock, shadow it with Distress inks, and stamp "Hay friend".


When the background is dry, begin by placing the elements on the card. Some of them are fastened with glue and some with self-adhesive foam pads to create depth.
The sun is from the Campsite die set.


Thank you for coming over and have a nice day. 


Saturday, January 21, 2017

~ Udder-ly Awesome ~

Hello Scrapping Cottage friends! Thanks for taking the time to stop and visit today. It's Mary Marsh here bringing you the Saturday edition of the Blog.

We have some fabulous new stamp & die combo sets released and they are available at 25% off in the online store. I am using a couple of the new sets today with the On The Farm and Farm Animals.

So let's get started with some details on the little farm scene I created on my card today.

Black Card Base: 4 1/4" x 5 1/2"
Image Panel: 4 1/8" x 5 3/8"
 
I started my card by stamping the images with Memento tuxedo black ink. I colored the images with Copic markers and Prismacolor pencils and gamsol. This ink doesn't bleed into your inks or pencils. I also used X-Press It blending cardstock. It is designed to work with Copic markers. 
Markers & Pencils used to color images

After the images were colored I started on my background. I used tumbled glass distress ink for my sky then shabby shutters and mowed lawn for the grassy area. I used some torn paper to create the appearance of a hilly area. I wanted a softer background so I used a stencil brush. It achieved the look I was after. At the bottom of the card, I used tea dye distress ink for a non-grassy area.
 
 I decided to use the "udder-ly awesome" sentiment from the Farm Animals set. I cut a cloud from the "clouds & sun" die set because I wanted to stamp the sentiment inside of it. This sentiment is a single line and was just a bit to long for my cloud.  So I used my MISTI tool and took it to a 2 line sentiment. You just tape off the part that you don't want stamped and ink up your sentiment.


When I started the assembly of my card, I decided to use the fence stamp and die from the On The Farm set. And then I added some hearts going from the cow up to the sentiment. I just thought they fit so well with this sentiment. The hearts are from the Love Bird Branch die set.

 
Well that's it for me for this week. See you next week.
http://www.scrappingcottage.com/cottagecutzfarmanimalsstampanddie.aspx
 

http://www.scrappingcottage.com/cottagecutzonthefarmstampanddie.aspx
 
http://www.scrappingcottage.com/cottagecutzlovebirdbranch.aspx