Monday, February 19, 2018

Eggs in a Basket/Wagon

Hi, Lois here with my Monday card.  Spring is making its way into Florida at last.  After a few cool/cold snaps, it's finally getting more like Florida weather around here.  CottageCutz has a new Spring release with some really cute flowery and Easter dies, which are on sale for a short while longer.   I've used several of them on my card for today.


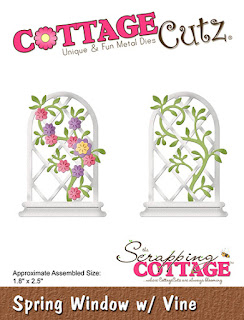
I started my card by running a strip of white cardstock through my Xyron sticker maker and then cutting out the Spring Window w/ Vine.


By putting the adhesive on the back of the cardstock prior to cutting, I'll be able to construct my window more easily on the card. 

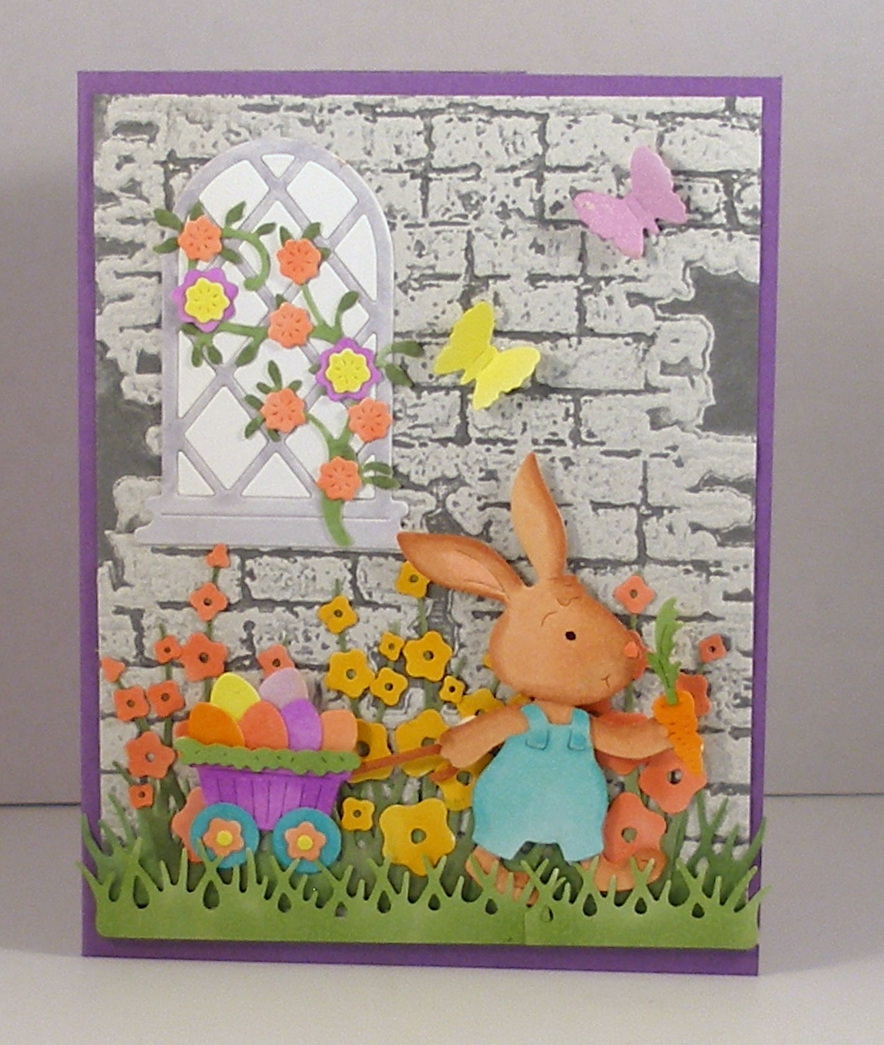
I cut my card base as follows:

Purple - 8 1/2" x 5 1/2"
Gray - 4" x 5 1/4"


I wanted a brick background for my bunny, so I used a favorite technique of inking up my embossing folder with gray ink prior to running the cardstock through my Cuttlebug.  The ink is pressed onto the paper, creating the "mortar" between the bricks.


I then cut two sets of shapes from the Spring Meadow die.  I did this because I knew I would need more than just the single set of die-cuts for my little scene.


After coloring both the Spring Window and Spring Meadow die-cut pieces with Copic markers, I constructed my scene on the brick background.


As you can see, I saved the inner white pieces of the window to place into the window frame.  When I attached the front layer of grass, I put narrow strips of foam tape behind the die-cut pieces.  This would allow me to insert the bunny behind the grass.  I wanted to wait until after the bunny was on the card before placing the butterflies.

I then cut the bunny out . . .


. . . and colored him and his wagon and eggs with markers.


After constructing Mr. Peter Rabbit and his wagon full of eggs, I placed some small foam pop dots behind his head as well as the wagon and some glue behind his feet.  That way his feet would slip in behind the grass, but his head, body, and wagon would be popped up.


I then added the butterflies in the open space next to the window, and my card was completed.


CottageCutz dies used on my card are:

http://www.scrappingcottage.com/cottagecutzspringwindowwvine.aspx


http://www.scrappingcottage.com/cottagecutzspringmeadow.aspx

http://www.scrappingcottage.com/cottagecutzmrpeterrabbit.aspx


Sunday, February 18, 2018

Small Spring Cards

Hi!

It's Anja here. I finally got my package, full of beautiful new Cottage Cutz dies. Today I wanted to create a bit of spring. We're still having a lot of snow and it's snowing again today. And if I can't have spring outside, I can make it on my cards. I made to small cards today. If you add an Easter egg or two, you can easily turn it into Easter cards.


For my two cards I used:
- Cottage Cutz dies (Spring Basket, Spring Meadow, Spring Watering Can, Nested Stitched Scallop Circle Set, Circle Set),
- Distress Inks (Mustard Seed, Milled Lavender, Dusty Concord, Worn Lipstick, Abandoned Coral, Shabby Shutters, Mowed Lawn, Peeled Paint, Forest Moss, Brushed Corduroy, Vintage Photo, Black Soot),
- white card base (two 4x4 inch),
- patterned paper (two 10x10 cm),
- white card stock for die cuts,
- silver pigment ink,
- black pen,
- white foam,
- paper glue.

First I cut all the circles. I cut two of each. I used the largest circle die for scalloped circles and the second largest from the circle set. I wanted a bit of dimension on the card, that's why I used foam and cut two circle frames with the two largest circle dies.


I glued the foam on the scalloped circle frame.


Then I cut two squares for the background. I used patterned paper from my stash.


Then I cut all the other pieces and colored it with Distress Inks. This watercan die is so beautiful.


And then I just assembled and gued everyything together The final result is two mini spring cards.


I hope you have a beautiful Sunday. See you again next week. 
Anja Z.


Cottage Cutz dies I used:


Saturday, February 17, 2018

Egg Painting Bunny with Video

Hi Everyone, Sherry here and I'm a guest designer for CottageCutz and am over the moon excited about it. I hope that you like the project that I made and enjoy the video. I will link all of the dies that I used at the end of my post.


Remember to practice your CPR - Craft Pray Repeat. Thanks for visiting me today and happy crafting.
God Bless,
Sherry

Friday, February 16, 2018

Spring Fox

Good morning Cottage Cutz fans!  It's Jeanne today with a bit of spring!  I love the Stitched Flowers dies and wanted to showcase them. (And they're on sale for a limited time!)  What better way than with this sweet fox.
I had an idea for my palette of colors but nothing specific.  So I started by using the Stitched Flowers die and cutting them in multiple colors. (I now have a lot extra for additional cards! So easy!)
Then I played with the colors and arrangements and eventually decided on these flowers in the blue family.  The fox is cut from Cajun Craze cardstock with his chest and tail tip in Very Vanilla.
I cut a piece of white cardstock to 8 1/2 x 5 1/2 and scored it at 4 1/4 for a top fold A2 card.  I cut 5 1/2 x 4 1/4  panel for the front that I embossed with a striped embossing folder.  And my last panel was cut with the largest of the Double Stitched Rectangle dies.
I assembled the fox and colored his eye and nose with a black multi-liner pen. Then I took the stitched panel and arranged the flowers.
Finally, I used foam dots to adhere the fox between the flowers and foam tape to pop the stitched panel up off the card face.

I just love the new Stitched dies!  They really add a special detail to the images.  The Stitched dies and the new Spring dies are all on sale for a limited time.  Make sure to check them out!

Dies used:
http://www.scrappingcottage.com/cottagecutzstitchedflowers.aspx

http://www.scrappingcottage.com/cottagecutzsweetfox.aspx
http://www.scrappingcottage.com/cottagecutzdouble-stitchedrectanglesetbasics.aspx

Thanks for stopping by today and I hope you have a creative weekend!


Thursday, February 15, 2018

Easter Peeps!

Good Morning Scrapping Cottage Family!

Cottage Cutz has a brand new release of two collections of dies.  They are In Stitches and Spring Designs in all there are 33 new dies.  And for a limited time the new dies are 25% off!
Today, I am really excited to be sharing one of our brand new Easter dies!  This little chick is just adorable!


Design steps:

 1.  Using the Just Hatched Chick die cut the chick bodies and wings out of yellow card stock.  Cut the eggs out of white, cut the feet using orange and the little head feather out of red
2.  Use TH ink and add some shadowing to the different pieces
3.  Assemble the chicks and add tiny rhinestones for the eyes
4.  Cut the word Easter using the Stitched Alphabet dies
 5.  Using the Pierced Wide Rectangle Frame die cut out a white frame.  Use an A2 white card base, cut a yellow chevron piece of DP slightly smaller than the white card base.  Cut a piece of kraft card stock 4 1/2 x 3 1/2 and run through an embossing folder
6.  Assemble the card as shown
Cottage Cutz Products


Please make sure that you check out all of the new release dies! They are amazing!!

Blessings


Pam